With Dad back from holidays we set aside two days to attach the lead keel. In the end we needed all that time as you will see. While he was away I had obtained the silicon bronze keel bolts, countersunk the holes and epoxy coated the keel.
First thing was to roll the keel right way up again and cut a layer of felt to go on top. I managed to buy the felt (used as removalist blankets which you can buy in one metre lengths about 1200mm wide) and we cut two pieces to fit. We lay them on top of the lead and pushed down on the holes to mark where they were, then used a punch to cut out holes for the bolts to pass through.
Once they were all in place we stood the bolts up in them to check:
Between the lead and the keel deadwood there is a small "o" ring countersunk into the wood, with another inside the boat underneath the washer and nut in the hardwood cross piece. Hopefully this will keep the water outside!
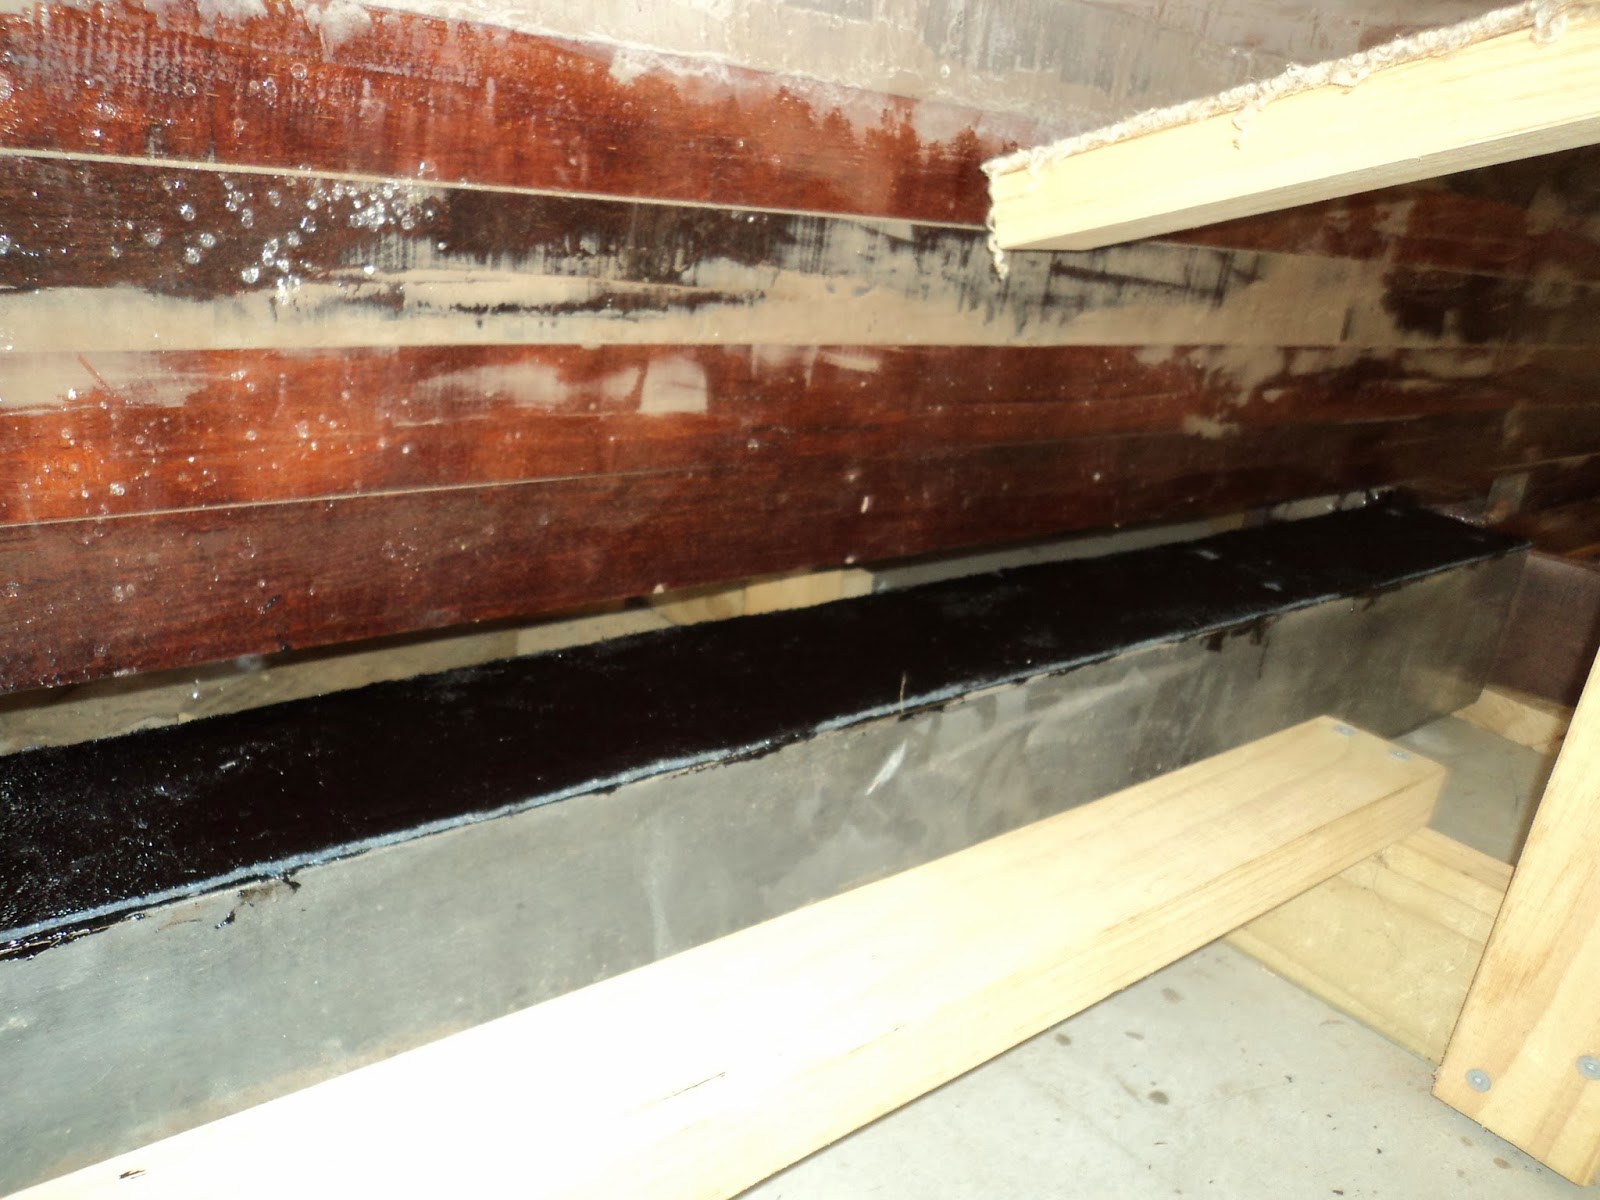
With that done we manoeuvred the lead into place on rollers by hand with bars and leverage, then put a thick coat of bitumen on top of the lead:
Then we carefully lay the felt down and lined up the holes, then put another layer of bitumen on top. We should have gone a bit thicker in the middle, but never mind
We took all the bolts inside and stood them up in the holes gently pushing them down until they came all the way through. When we did this I mixed up the single one at the end of the galley and the one at the very front, they were only 10-15mm different in length. We will find that out as well in a minute....
I couldn't be bothered going inside the house to get the bolt final measurements (Idiot!) so went off my early calculations of wood depths plus lead depths. Checked a few measurements, they all looked good so pushed them back up inside until they were just sticking out.
Then we pushed the keel back underneath and jacked it up into place using hydraulic jacks at the rear (heaviest end) and bars as levers with chocks at the front. We sent my daughter up inside to push the bolts down one at a time as far as she could and they all went into the lead holes varying depths. This was going too well!
I went inside and gently tapped the bolts down and we put nuts and washers on four of them, two front and two rear. Two were firm so we didn't bash them in,
we meaning the tradesman telling me not to as I was about to give them curry with the biggest hammer I could find.
That is when the first problem showed itself. The bolt at the galley tapped all the way down, but wasn't sticking out of the lead into the countersunk space. I had checked the bolts when they arrived from the company and they were all the lengths I ordered so I either didn't measure them properly or they were in the wrong holes.
Luckily we could tap out the front one using a small bolt from below. Checked the galley one when I pulled it out inside with the tape, that is the front bolt. Swapped them over and no harm done other than to my pride.
The other two were not as easy. One was in the forward four, we tapped it out from below and ran the drill back down the hole into the lead. The final hole came out about 5mm away from the one we had drilled, but we could still get the washer and nut on so all good.
The final one was one of the very back two, there was about 20/30mm of clearance under the lead to work with. Dad managed to get a nut and some small pieces of steel underneath and levered the bolt up about 20mm which was enough for me to lever it up carefully from inside. Then we ran the drill down the hole, but about half way down lead stopped coming out of the bottom as Dad drilled. We tried to clear it from below with wire, and from above but the drill was a normal sized one welded onto a piece of rod. It would not pull shavings all the way up and out of the hole. Dad kept going very carefully with a smaller drill and managed to get all the way through. But the hole was a good 25mm away from where the original one was with the countersinking. No room to countersink the new one, and I was not pulling the whole keel off again. Quick brainstorm, the new hole was between the countersunk one and the side of the keel so why not use a small hacksaw blade to cut the bottom up enough to chisel out the lead from the side. And that's what we did. Took Dad ages while I tidied up the squeeze out of the bitumen, filled in the middle of the keel where we didn't put enough on top initially and filled a space at the rear of the lead with 12mm ply packing. Put the final nut and washer on (after one false start because I didn't cut the new lead up high enough to bury the nut) and we were done.
Below is the 12mm ply epoxied in the space between the lead the deadwood at the back. I didn't allow enough for shrinkage when we cast the keel. This will also be filled/covered in bitumen in the near future.
Looking forward along the keel, you can see why we couldn't work on the bottom of the lead at the back!:
Dad went home for a well earned break and I felt like I was back in business. I have been feeling that the keel was slowing everything down, probably only in my head but now it is on the speed feels like it is back!
I dragged the orbital sander up on the deck and sanded the tape I had laid down already. Below shows the front edge of the cabin, the space for the mast tabernacle and the deck join over the rear of the king plank.
Below is the forward part of the deck, taping along the hull/deck join and also the deck join over the forward king plank.
The rear of the cabin and side deck:
And finally the other side of the cabin top, showing the space cut out for the rear hatch:
With the prep done, I pulled out the large roll of glass cloth I used for the hull, and cut pieces to go across the front deck. Below is standing in the anchor well looking down at the very front deck:
And a view slightly further back. You can see the pieces rolled up each side on top of the cabin for the side decks:
It has been a while since I have done any large area fibreglassing, I forgot how quickly it absorbs epoxy but also how big a difference it makes visually. I rolled down a thick coat doing one piece at a time working from the front back. Once I had positioned each piece I rolled it to wet it out. Once the whole lot was done and the epoxy had gone tacky I rolled another thick coat on top. I will clean up and maybe put one more thin coat over the whole thing.
The forward deck after. I stopped the glass after it had overlapped the tape on the hull deck join:
Slightly further back:
And the side deck:
Next the cabin top/sides, and final clean up of the deck.