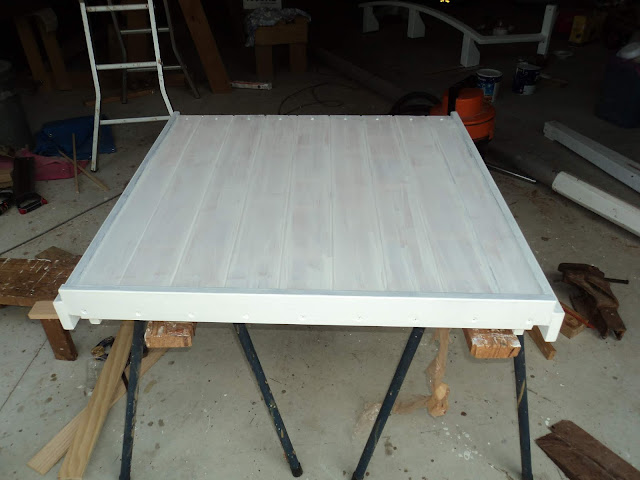
First up was the main hatch which got two thick coats of epoxy wet on wet for sealing.
Followed by a sand and two coats of oil based sealer undercoat:
Then it got several coats of water based house paint. At the same time I finished the main hatch entrance which had a piece of hardwood screwed and epoxied onto the inside on both sides:
This also forms the drain for the edge of the main hatch, sloping aft towards the cockpit to drain down beside the washboards. This is from above, aft to the bottom of the page.
After a sand they got painted as well as the rails:
Then the whole lot was put in place and the garage screwed on. Note the handrails on the outside, I didn't want to put holes in the cabin roof, and it also leaves the sides of the cabin clear for sheets it I decide to run them aft.
Around paint drying I final mounted the nav lights on the bow (just aft of the first stanchion), along with fairleads (just above the end of the rubbing strake) and the whisker stay plates each side (in front of the nav lighst).
This then led onto mounting the padeye for the attachment of the forward end of the lifelines, using some nylon rope to check the runs. I was going to put it forward of the fairlead, but the lifeline would foul forward mooring lines:
I also cleaned up the brackets my father welded up in stainless to strengthen the forward end of the taff rail (more later in this post). The hole allows a coach screw to come up from underneath through the end of the combing, the upright plate stops the wooden post being dragged forward by the lifelines and the piece leaning against it gets through bolted between the post. Vertical plate down the outside of the combing gets two countersunk 8g 25mm screws.
Today's (9 Feb) working bee was to mount the taff rail, finish sealing the rubbing strakes while we had the sika marine sealant out and then mount the lifelines. We tape up around the quarter deck, rubbing strakes where we needed to and spread sika everywhere, sometimes even where we needed it. Below shows the taff rail bolted screwed and stuck in place.
And a shot showing the bracket. The two through bolts are 6mm stainless:
And from the side showing the rear plate spreading the load of the bolts. Originally we only had the bolt from underneath the combing, this is much stronger. The tape was for the continuation of sealing once we had the taff rail on.
After sealing the final bits of the rubbing strakes we ran the lifelines down each side. 5mm galvanised wire with allegedly sun resistant plastic PVC coating. Swages each end, the aft fitting that goes through the wooden post is threaded which allows some ability to tighten but they are not structural so no point overdoing the tension. Below is looking aft from the main cabin hatch:
Looking from the corner of the shed down the port side:
Looking across the transom, didn't end up buying the winches yet but took some measurements and hopefully the handle with turn between the lifelines (or my measurements are out, which is a good possibility!).
Looking aft along the deck from the anchor well:
And forward from the quarterdeck:
Only mishap was I forgot to feed the final lifeline back through the stanchion after I cut it to length before Dad and I put on the swage. Extra trip to the hardware store to replace it (replaced and shortened the first one we did seeing we had a two pack of swages) but only lost an hour.
Externally I need to paint the outside of the washboards and then I can think about pulling it out of the shed perhaps. Need to ring the engine bloke again, he is flat out but has most of the fittings etc ready to go.
Inside I have started cutting the foam matresses to fit, first one is away with mum while she looks at covering it for me. Also have the extra ply to build the engine box/step/table. Then splash around some paint in the main cabin and start ringing riggers/boat transporters and sailmakers. That will take longer than I think as usual.....


