I started making a box to put on the rear of the cabin to hold the Raymarine Chart plotter (Element 7S) and the radio (Standard Horizon GX1300E). I was originally going to mount the plotter on some form of swivel so I could move it around into the companionway to see it from the cockpit. But modern technology overtook me. The chart plotter can connect to a phone or tablet, both of which I have already, so a permanent mount inside was the go.
Below is the front cover started looking from the inside out. The bit missing is a ply rear solid piece which was epoxied and screwed into the rear cabin wall (12mm ply).

This is the front which is removable. The bottom middle piece ended up being removed to allow space for the plotter.

This is the permanently mounted section of the box. The top and left hand side are glued and screwed to the rear ply (which is onto the wall before painting). The radio mount is on the right. Wires being run through, I also had to run the radio cable (cockpit rear handrail) and transducer (rear of transom) forward. This was done with through deck fittings to keep out the water, and the wires running under the cockpit seat on the starboard side forward into the foot of the berth, then up into the storage area behind the cockpit seats (long items storage each side back to transom). The opening to that area is the square just below the wall unit.

And a final view. The radio is recessed through the end piece, and the bottom piece slots on and is held by two screws. I drilled air holes under each for ventilation, I will see if I need more.

The linking of the plotter to the radio was not as easy as I first thought, being different signals (NMEA2000 vs NMEA0183). I wanted the lat and long displayed on the front of the radio as well for calling in an emergency, so needed a Raymarine converter unit and another cable to get them to talk to each other. Worked out okay, I mounted it in the long storage area where I had to roll up all the extra wire from the radio and transducer, as they cannot be cut to length.
With Dad back to help (again, he had been down to put a stainless plate on the cockpit rail for the radio aerial) we attacked the mast tabernacle. It sits in a space at the front of the cabin and is constructed from 6mm steel. Underneath it is a 20mm hardwood pad, then the deck (fibreglass over two layers of ply, then another 20mm hardwood king plank which is supported by several curved deck beams and finally a hardwood compression post.
Below is with it bolted in place, you can just make out the bottom of the radio aerial on the top left. Wire sticking out is the connection to the wire for the masthead/nav lights inside the mast.

The tabernacle was bedded on butyl rubber, with the bolts being 8mm stainless. Below shows the starboard side, rear two bolts onto a single 6mm steel plate with spring washers, and the forward one onto a 40mm square 6mm plate with spring washer as it goes all the way through the curved deck beam as well. It's handy having a fabricator to call on!

This is the port side inside the galley space. Disregard the bolt to the right, is is reinforcing for the rear curved deck beam. The forward two are the two rear tabernacle bolts, with washers and spring washers against the 20mm hardwood king plank. The vertical piece of wood to the left is the kwila hardwood compression post. The front tabernacle hole has a 110mm x 8mm stainless coach screw that goes down into it.

Seeing we had the mast, we threw it up for a test to see how it looks. Bit of safety tape for a flag.

I have also finalised the under galley area. In the untidy photo below you can see the main galley with a gimbled spirit stove, and to the left there is a sink with drain tray. Directly below the stove is a pull out draw for storage or knives, forks, cooking stuff etc. At the very bottom is the access to the underneath storage.

I am not permanently putting in water tanks or a grey/black water system. To the right out of shot is an access door through which the cassette for the toilet can be removed. Further-est from shot is a 10 litre water tank connected via hose to a hand pump on the galley bench over the sink. The closer 10 litre will be waste, although I intend washing most dishes in a container in the cockpit where I can throw the water overboard.

This shows how the water container can be easily removed for top up. The white hose to the left has a normal hose joiner clamped in it (it has an o ring as well, and I had to heat up the tube to get it in so tight fit). The black attachment is an adapter from a normal hose to a 13mm watering system, again clamped into the hose after heating. The hose continues down to the bottom of the water, and there is a fitting and rubber seal to stop water splashing out hopefully with motion of the boat.
The black waste hose on the left is a slide in tight fit to the container.

That is the low tech version of how I will start. We'll see how it goes but little to go wrong.
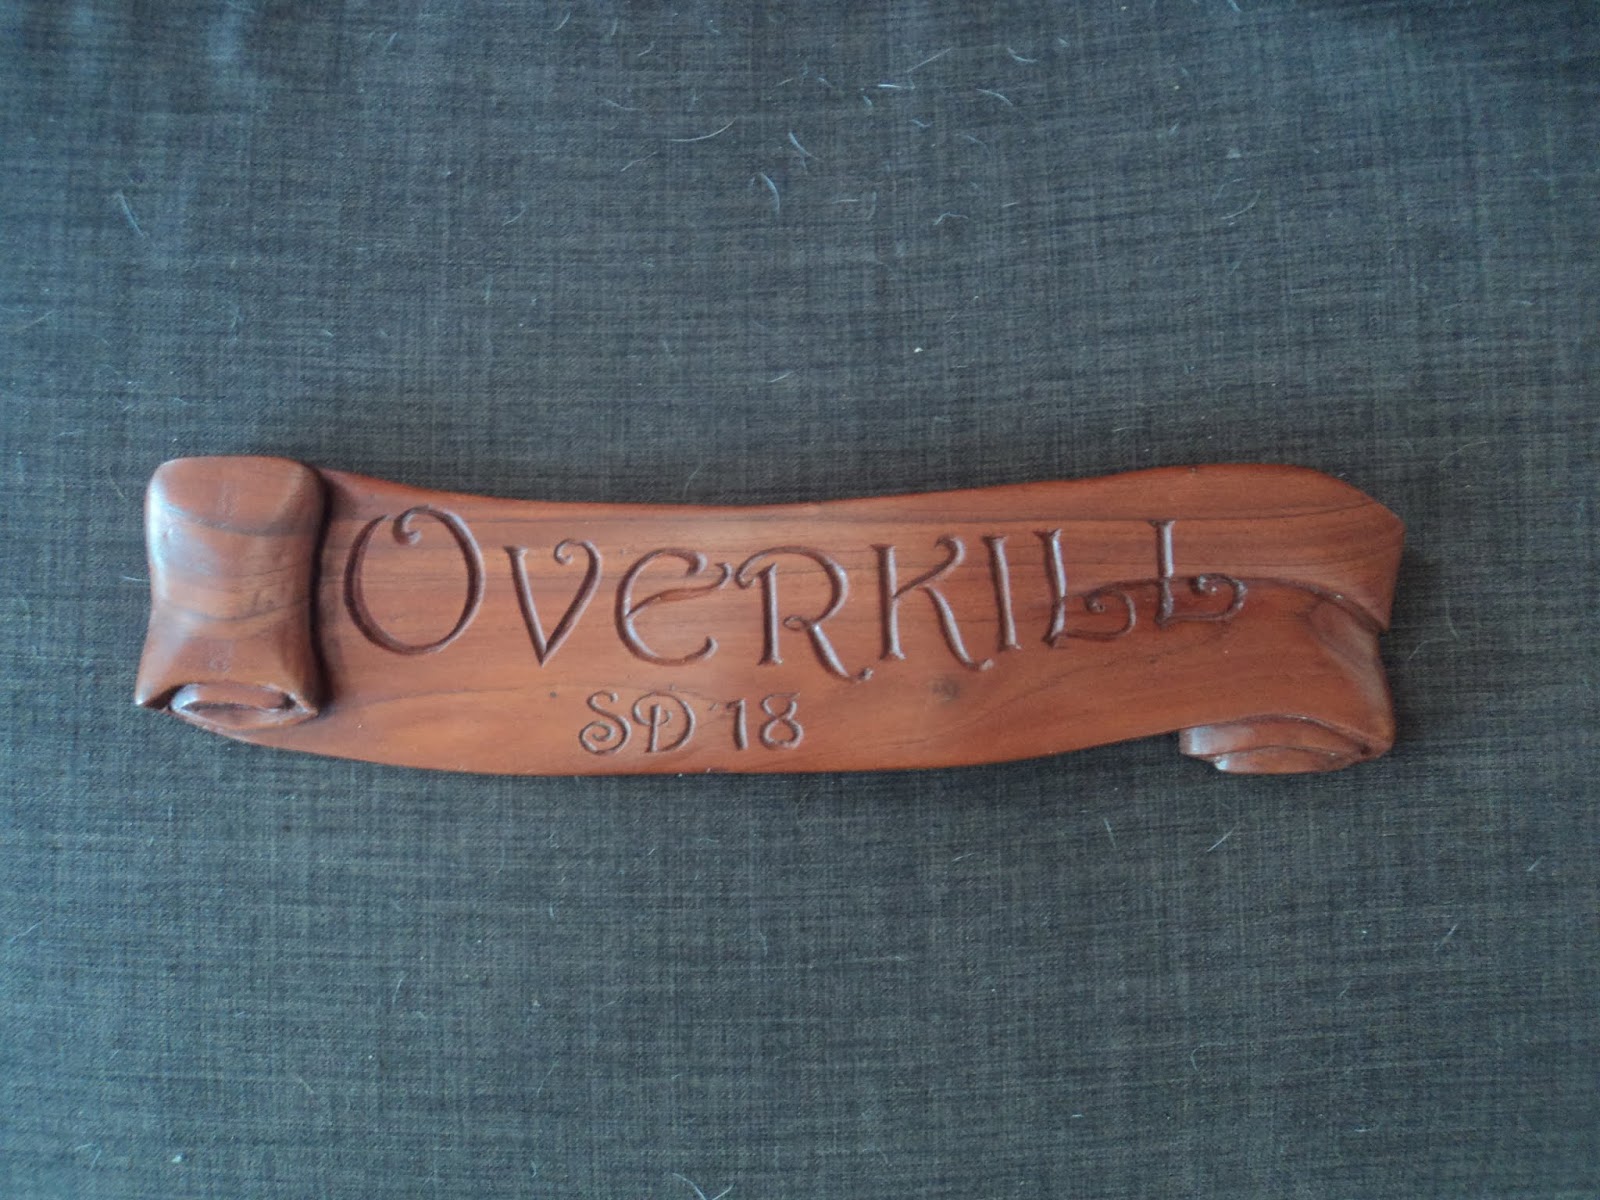
And finally a gift. One of the contributors on the Woodenboat forum was away from home and filling his time with some carving. This will grace the inside of the access hatch into the cabin. Photo to follow when mounted after some prep/painting/finish of the entry. It is about 600mm x 150mm carved scroll with the boat name and sail number in hardwood. Looks fantastic.
A big clean up is underway inside the boat, refitting a few doors in the main cabin and a little bit of paint and then I think it is time for the berth cushions to be put in.
Mal
A slanted roof can have a considerable effect on the actual shed style. With our custom slanted shed roof plans, you can build an amazing shed roof.
ReplyDelete