For those who don't want the details of attaching planks, scroll down to the photos further down.
The process for placing a plank is fairly simple (the first one I just measured an angle around 20 degrees and clamped it in place, subsequent ones you butt up against the previous plank).
1) Place the plank in position and mark the line along the top of the chine stringer (the top as you look at it where the two chine curves meet), ensure you have enough sticking past the lowest stringer. Remove and cut.
2) Re position the plank and clamp in position at each stringer. You may need to cut or sand a bit off the edge where it meets the first plank to get it to sit against it. Don't worry about a small gap, epoxy from the second layer will be forced through to fill it.
3) Using a template (I made one from a scrap bit of ply with holes drilled in it) mark the positions for the three screws at each stringer, drill (don't go too far into the stringer or you will go all the way through) and then countersink the holes.
4) Put screws in the outside two holes (I left the middle one empty).
5) Remove clamps and repeat until you get to where you need to stop. I did eight planks in a day but for the last one have about 15 dry fit which will require a while to epoxy and clean up.
A single plank looks like this:
6) Remove the dry fit planks leaving the screws in place on the plank. I left the top one closest to the previous plank and outside one on the opposite side, next stringer down sticking out a bit to guide me/line up with the holes when I refit the plank to epoxy and screw back on.
7) Mix epoxy and glue powder, spread along each stringer using the holes from where you drilled to indicate how far, clamp plank back in position.
8) Screw on, I did all the ones beside the previous plank working top to bottom, then the middle ones and finally the last. My theory was the it will force the plank evenly on.
9) Remove clamps and move on to the next one.
10) IMPORTANT - once you have attached all the planks, crawl inside and scrape away the extra epoxy that will be running down from the stringer/inside of plank join. It is not much trouble, looks much neater and will be a thousand times easier than trying to sand it all off when the hull is flipped.
Where necessary I did leave a few clamps on to keep the bottom even.
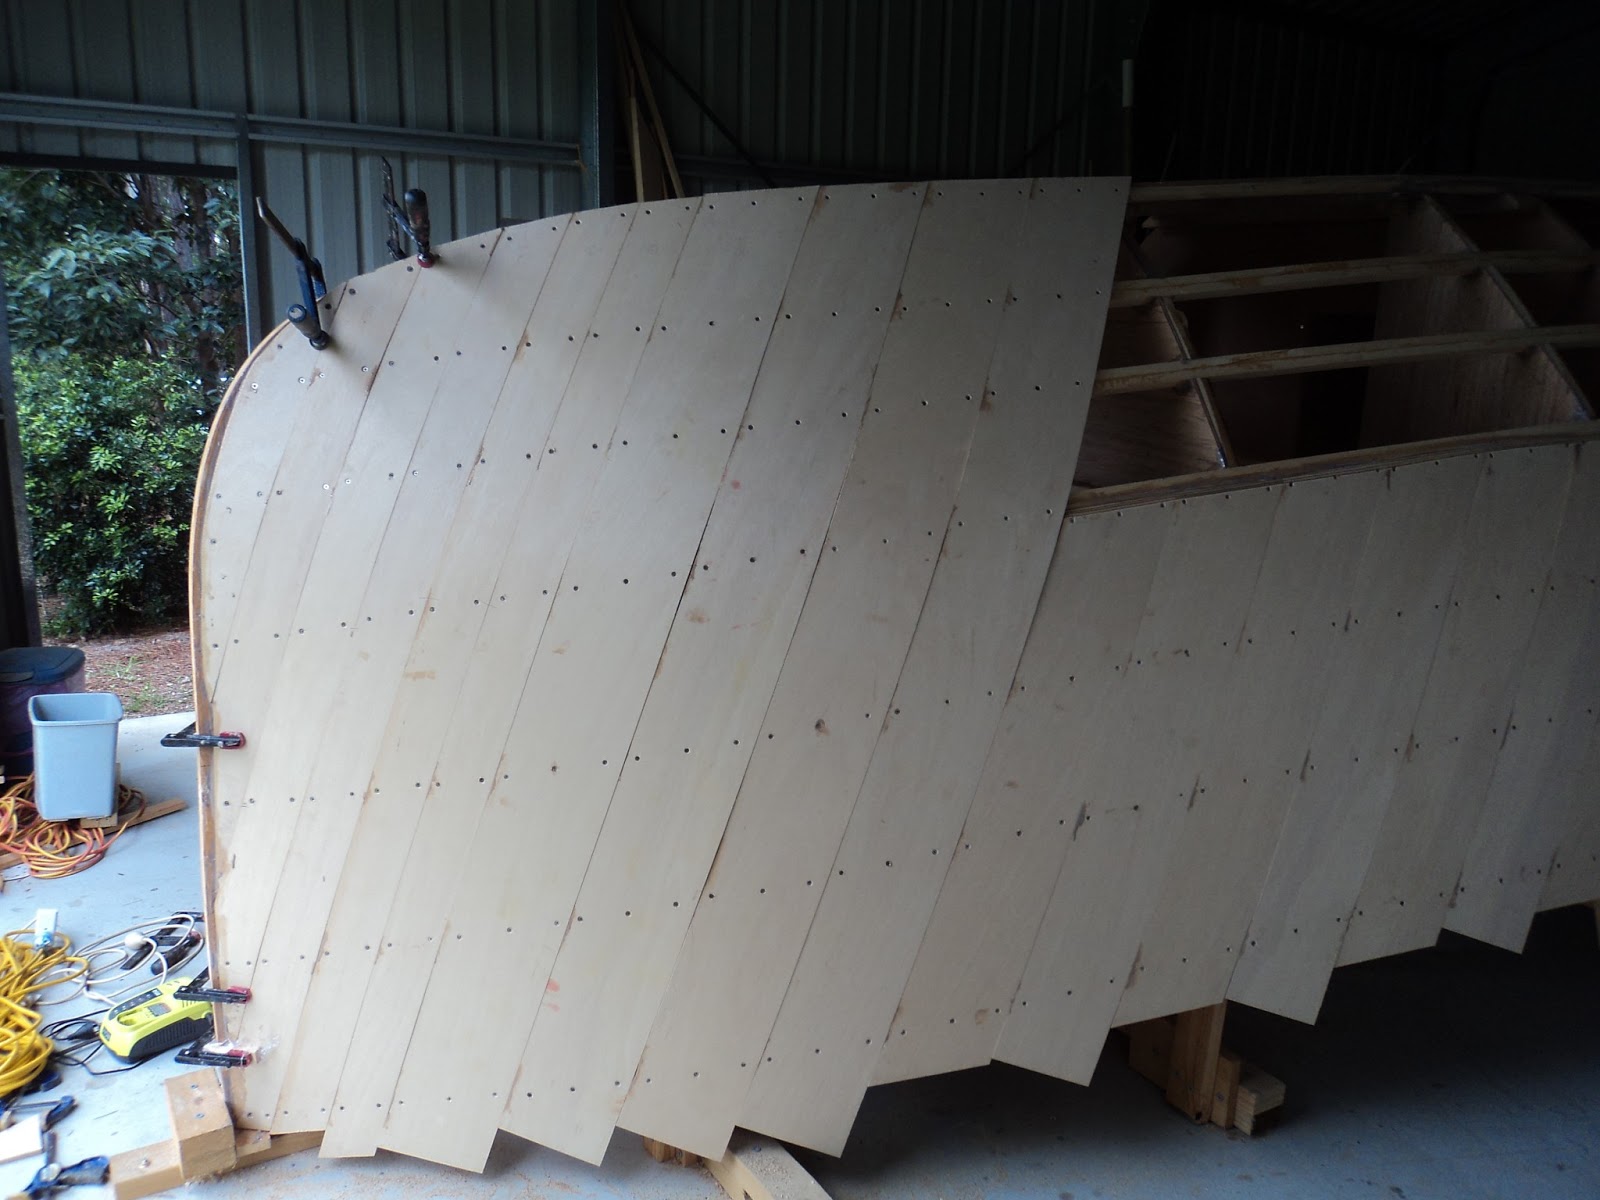
The first side is planked all the way from the transom forward to just in front of frame 2 with epoxy and all screws in (see below photo). The next plank and all the ones forward from here will be full length hopefully on an even curve.
On the opposite side, from transom forward to frame six epoxied and screwed:
And from six to just forward of frame 2 dry fit:
From the inside, frame on the left is frame 6 (bookcase support):
And planks from frame 6 forward removed ready for final attachment:
Even though only dry fit on one side, couldn't resist an inside shot again to see how the hull is closing in the gaps: