Sunday 21 September 2014

Interior work and main cabin roof supports

The final touches on the forward cabin are almost complete.  I've finished painting, below shows the first coat on the cupboard doors:


And the final coat on the inside:


While I was waiting for the paint to dry I continued in the main cabin, cutting out the access holes through the seat/berth tops.

Before shot after clean up:


And after with two coats on:


I also re-enforced them where the lids sit, then tipped them upside down and painted the areas where the glue would not touch and the underside of the lids.


I have glued in most of the cockpit supports, the hardwood king plank I have left out at this stage so I can access the keel bolt holes and also put the fuel tank in place prior to putting down the floor.  I will fill in the storage each side at some stage.


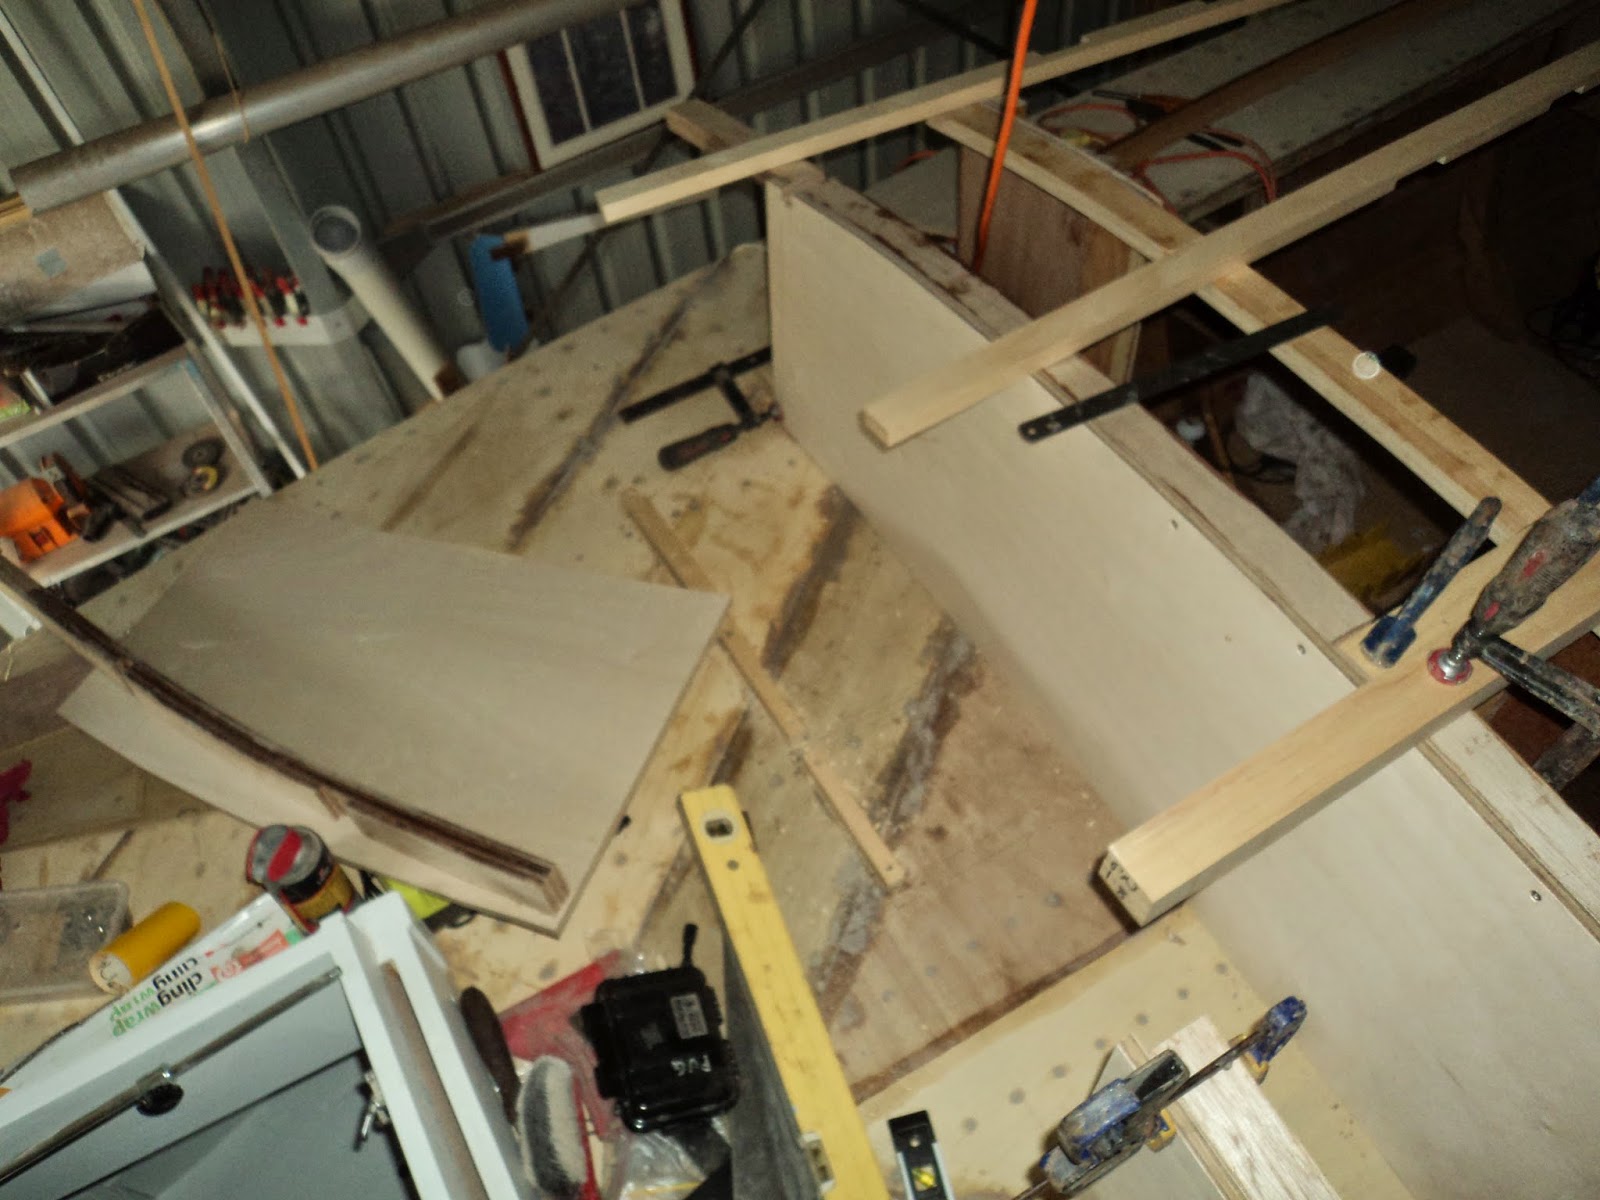
I've also commence the supports for the main cabin sides and top.  Supports are 40mm x 20mm clear hoop pine, half lap joined into the laminated cabin beams.  The side ones follow the angle of the sides, the others follow the curve of the beam.  The middle ones have a vertical face planed on the them at the cockpit end for the access hatch, there is also another laminated beam to be placed in the middle to support the end of the access from the cockpit.

Below are the first ones in place:


With the cabin front and hardwood lower beam dry fit, forward storage locker port side dry fit and all beams in place.


Same shot looking aft showing the storage locker front.  Both the cabin front and the storage locker fronts are 12mm ply, the cabin front will have 12mm doublers inside and out as well in the middle.


Starboard side showing the deck and 20mm supports in place already, laminated beam and front sitting to the left:


And an overhead shot of the storage.  I am thinking about using this for LPG storage as the galley is directly below it and it will have drains on the deck edge side.  To the right will be an air vent, more on that later.  The space between the air vents each side is where the mast tabernacle sits and is through bolted.


Next steps are put the forward cabin doors, berth supports and sliding door back on and it should be almost done.  Then concentrate on the main cabin sides and roof.

Friday 5 September 2014

Front and main cabins continue

Before I start a warm welcome to Mr Charlie Wipple (pen name Chuck Tyrell) who has stopped in for a look.  It is partly his fault I find myself on this happy journey.   He commissioned and built the first Sundowner which was detailed on his blog and the John Welsford design site.  I have spent hours going through the details of the build he kindly shared, if you are here researching the Sundowner design click the links on the top right of the blog for more info.


The fit out of the forward and main cabins has been the goal over the last few weeks while I contemplate the keel casting and wait for a quote from a foundry.

In the forward cabin it was time to put on some dressing to cover up screws and also give edges a nice clean finish.  Once I had attached the ply fronts I covered the corners and joins with pine.  Below is clamped and glued in place:


And a shot looking forward at the open top storage.  I didn't want to cover it all the way up because I thought it may make the cabin feel too small.


Also some small fiddly bits to cover the cupboard/roof joins:


Once they were all cleaned up I put tape over the beams and king planks I wanted to leave just clear epoxy and slapped on some paint (three coats).


This is the finished result, I like the way it ended up, the locker doors are clear epoxy finished with dress wood around the sides (photo to come).  Looking forward.


From a bit further back.  Need to wipe down the earlier paint, it is not dirty just dusty:


Looking up with king plank on the left and hatch opening:


Same area looking aft to where the sliding door is:


Then I worked backwards, this is laminating the hardwood beam that the cabin front attaches to. Silver ash in 8mm strips, four or five from memory.  This will be bolted to the deck and beam underneath through the king plank, and also bolted to 12mm doublers on the 12mm cabin front inside and out :


The 20mm x 20mm pieces are the bottom supports for the deck storage boxes and vents.  They are screwed through the deck into a laminated beam underneath.  This will make more sense in a future post.


Then I started the seats/berths in the main cabins.  After putting a few more doublers on the existing supports I marked where the top meets the hull and screwed in some supports for the hull side.  Had to cut/shape the angle to suit, most were close to 45 degrees so not too hard.


Then the tops were fit to the curve of the hull:


And then cut off flush with a curve down the rear which will no doubt be used to step up onto the engine box and out into the cockpit.


One side is finished all the was to the bulkhead at frame 8 with the side closed in as well up to meet the cockpit.  Still all dry fit and access to be cut out yet prior to paint and glue/screwing into place.


And to finish a shot looking down into the cabin from the rear standing in the cockpit.


I will continue with the front cabin doors and main cabin fit out so should have some final shots of the front storage in the next few weeks.