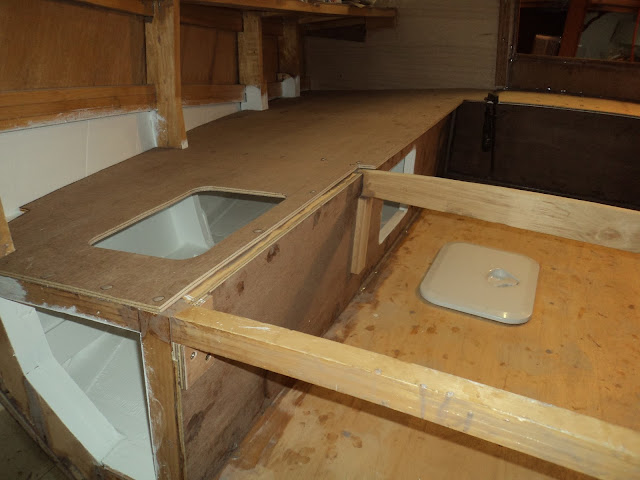
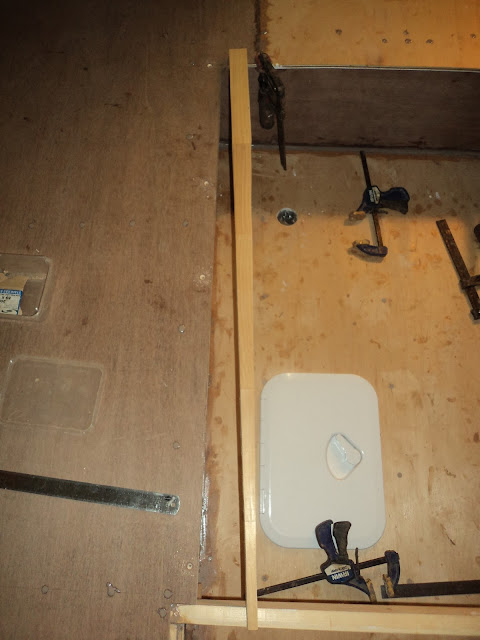
While I was getting motivated and sorting the fuel tanks previously I had cut to size and fitted the seat tops including notching them over the frames so they met (as close as I could get them!) the hull. I marked where the frames supported them, and epoxied and painted the undersides. I left them oversize into the cockpit so I could trim them back later. I had also cut and painted the forward end of the cockpit, which I glued and screwed in but didn't take a photo.
I had almost forgotten I had also cut the 20 x 20mm for the bottom support of the seat fronts. Grabbed it from under the boat and screwed/epoxied it down both sides. The hatch in the cockpit floor is just sitting there stopping shavings going into the bilge, more later on it. You can also see the notches in the frames for the solid wood to support the seat fronts at the top.
I then worked my way down the hull/floor join on both sides covering the join with 8mm strips left over from laminating the frames. On the curves they were cut to match the hull, and a slight bevel sanded on the edge to match the hull down angle. These also give the benefit of keeping any water away from the hull unless it is 8mm deep, which will hopefully prevent leaks
Once they were in place both sides, I epoxy filleted the hull joins (much closer than the ply!) and along the sides and rear of the seat front support piece.

I had also pre cut the seat fronts, I added holes for access hatches into the under seat storage, marked the supports and pre drilled/countersunk for screws. The hole in the top one lines up with the plumbing fitting in the port side storage floor, more on that later as well. Also note the clip seal bag over the fuel hose from underneath to prevent rubbish going into the tank, bottom right.
On each side I backed up the access hatch on the inside with solid wood for strength and to screw the hatches into. Again I'll explain the hole below.
Then I epoxied and screwed on the seat fronts each side. Looking below is from aft into the port side under seat storage. When I bought my bilge pump for the space aft of frame 8 (under the cockpit floor) it came with hose and a hull fitting for pumping any water out. I decided that I didn't want to cut a hole in the hull for bilge water, and if I ran the hose out via the transom the bilge pump could be working away without me knowing. I decided to put a plumbing fitting in the floor of the storage, and run the hose up from the bilge into the storage area on the port side, then out into the cockpit. I will use the fitting through the seat front. This means that the opening into the bilge is high enough in the storage area that I have major problems if it is running to the bilge via the fitting. whilst at the same time will be glaringly obvious if the bilge is filling with water and pumping out.
Once both sides were on I epoxied filleted the cockpit/side join as far back as the rear smelly locker, and vertical at the front.
From further back, I covered the holes near the transom curved beam with extra ply:
With the cockpit sides in place I decided to put a layer of glass in the bottom of the storage areas. They were off cuts from the deck and should protect the bottom of the storage area from being knocked around. Below is looking down into the starboard storage area, top of the picture is forward:
And the larger port side, forward to the right of the picture:
The starboard side:
Further forward on the starboard side showing the pre painting on the aft end of the berth:
From the main cabin looking aft:
I then worked my way down the hull/floor join on both sides covering the join with 8mm strips left over from laminating the frames. On the curves they were cut to match the hull, and a slight bevel sanded on the edge to match the hull down angle. These also give the benefit of keeping any water away from the hull unless it is 8mm deep, which will hopefully prevent leaks
Once they were in place both sides, I epoxy filleted the hull joins (much closer than the ply!) and along the sides and rear of the seat front support piece.

I had also pre cut the seat fronts, I added holes for access hatches into the under seat storage, marked the supports and pre drilled/countersunk for screws. The hole in the top one lines up with the plumbing fitting in the port side storage floor, more on that later as well. Also note the clip seal bag over the fuel hose from underneath to prevent rubbish going into the tank, bottom right.
On each side I backed up the access hatch on the inside with solid wood for strength and to screw the hatches into. Again I'll explain the hole below.
Then I epoxied and screwed on the seat fronts each side. Looking below is from aft into the port side under seat storage. When I bought my bilge pump for the space aft of frame 8 (under the cockpit floor) it came with hose and a hull fitting for pumping any water out. I decided that I didn't want to cut a hole in the hull for bilge water, and if I ran the hose out via the transom the bilge pump could be working away without me knowing. I decided to put a plumbing fitting in the floor of the storage, and run the hose up from the bilge into the storage area on the port side, then out into the cockpit. I will use the fitting through the seat front. This means that the opening into the bilge is high enough in the storage area that I have major problems if it is running to the bilge via the fitting. whilst at the same time will be glaringly obvious if the bilge is filling with water and pumping out.
Once both sides were on I epoxied filleted the cockpit/side join as far back as the rear smelly locker, and vertical at the front.
From further back, I covered the holes near the transom curved beam with extra ply:
With the cockpit sides in place I decided to put a layer of glass in the bottom of the storage areas. They were off cuts from the deck and should protect the bottom of the storage area from being knocked around. Below is looking down into the starboard storage area, top of the picture is forward:
And the larger port side, forward to the right of the picture:
With those in place out came the paint brushes again. A coat of oil based undercoat/sealer, followed by three coats of external water based house paint. Below is the port storage area:
The starboard side:
Further forward on the starboard side showing the pre painting on the aft end of the berth:
From the main cabin looking aft:
I trimmed the cockpit edges of the seat tops, pre drilled and counter sunk them then glued/screwed them down. Below is the port side:
And starboard:
The bridge deck had also been prepared earlier, and was screwed and glued down. Below is looking aft from the main cabin:
While the screw holes were filled and drying I prepared some supports for the access hatches through the seat tops. I was keen to keep the seat tops free of anything for comfort, hence the access to the storage through the seat fronts. Below shows the 9mm pad for under the starboard side rear access hatch near the transom over the exhaust transom exit (opened for ventilation only hopefully), and the solid wood for underneath the seat top. Hopefully these with a nice layer of sealant will make them waterproof.
Below is the port side screwed and glued in place:
And underneath looking from the transom forward:
I also did the same for the access hatch into the bilge under the cockpit floor, and also the fuel filler:
The cockpit floor looking forward, I will fillet the edges to a nice smooth 45 degree edge to the floor so you don't catch your toe. It will also give the fuel filler and hatch 9mm clearance above the cockpit floor area, hopefully assisting with leak resistance.
I also positioned and trimmed some solid wood for underneath the seats. The seats extend out into the cockpit, supported underneath with 20mm thick solid wood. I trimmed them to match my not quite square cockpit, don't tell anyone and I am going to claim it gets wider aft to allow access to the storage and also to assist with using the tiller. These were also screwed into the ply and the holes filled.
That's the update, seat backs next but I am thinking of putting the quarter deck and transom on. After I sand down the epoxy over the seat top screws and have a cockpit beer!


Awesome progress. You must feel like the light is starting to become visible at the end of the tunnel. What sort of hours do you put in each week? Do you recommend this type of project for someone with a full time job?
ReplyDeleteThanks Rick. It does feel strange now I can stand in the cockpit and sit on the seats. And working inside yesterday I looked around and saw it was getting close to done in there. Hours each week depends on my work. I work shift work so days off during the week by myself regularly. I tend not to work in the shed when the family is home much. Full time job and building, make sure you have the space to keep it at home (I'm 35m from the house in a shed) and it will take years (make sure you really have the time/money to devote to it). I am finding it very rewarding, but I'm ready to sail NOW!
Delete