
Once that was in place I sourced some hardwood tongue and groove floorboards 20mm thick which when each side was planed to square were exactly the right width. After a bit of a plane of the keel I trimmed them to the shape:


And stuck them on top with a thick layer of epoxy/glue:

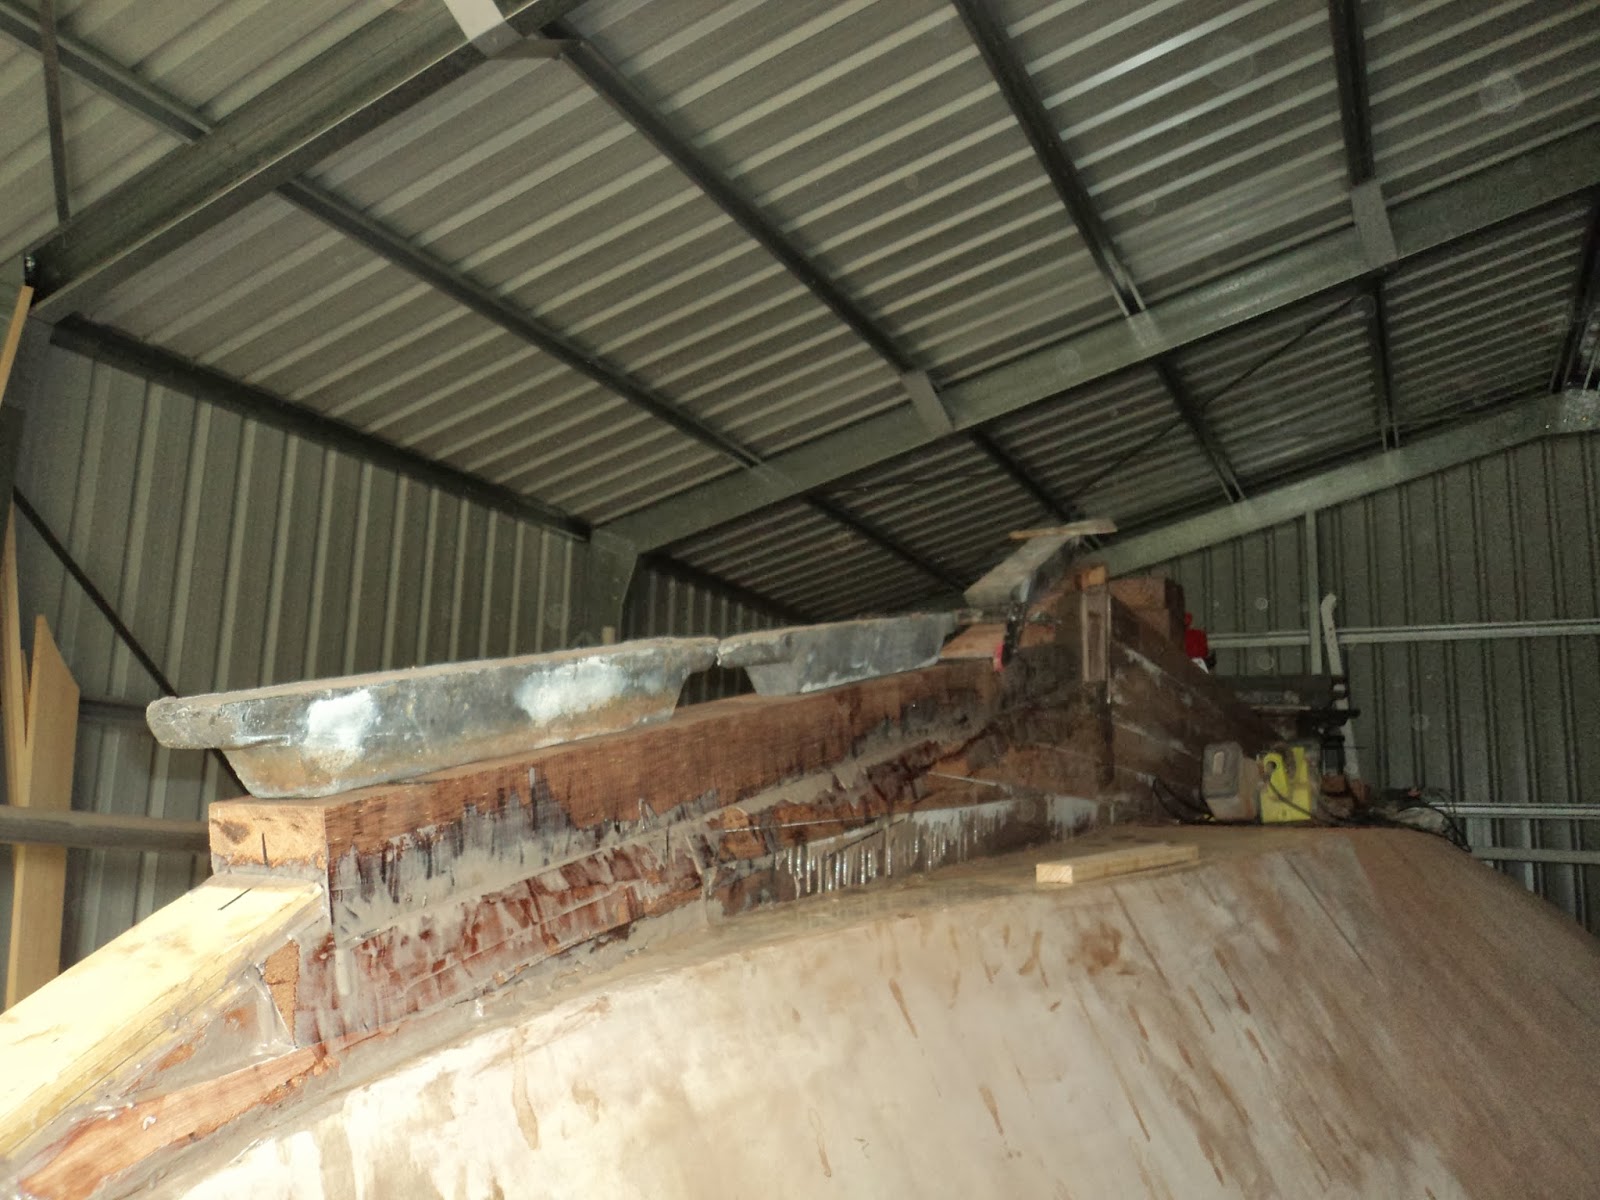
Then it was time to cap the front slope of the keel. First step was to mark 50mm each side of the centre on the existing wood and plane each side of the keel so it sloped from 150mm wide to 100mm This left me with a top surface which I put a cut down piece of keel wood (75mm high) onto.
The aft end of this piece meets an end cap on the remainder of the keel which also widens it back out to 150mm. At the same time I got two pieces of wood and angled them up so they finished where the lead keel will start.
Below shows the cap piece being glued in place, the rear most lead ingot shows the slope up and just to the right of it you can make out the angle to meet the other 150mm wide wood.
After jamming in as much epoxy/glue powder as I could I lay a thick fillet along the join and used a 90mm diameter PVC pipe wrapped in cling wrap as a tool to pull along the fillet to get a nice curve. Quickly lay on a 100mm wide fibreglass strip and wet it out. Below shows the result:

As you can see from above and below I then rolled on three coats of epoxy wet on wet over the entire keel including the top. Below is looking down the keel, you can now see the planed down front cap and the ski jumps which will hopefully help the keel ride up over whatever I hit!

Final shot below shows the worm shoe in place and everything epoxied. I planed some of the wood off the end of the keel in front of where the propeller goes above and below the shaft line to help improve water flow:

Final steps for the keel are to fillet the remainder of the keel/hull joins with sanding/filler powder and then fair the bottom surface out to the hull curves. I probably will not have an entry just for that but will include them in the next one which I am excited about - the roller over and support cradle to stand this thing right way up.
No comments:
Post a Comment