Instead of cutting a scarf along the face of each sheet and overlapping them, making a very long sheet that would be near impossible for me to position, the designer John Welsford uses a different type of join. The first step is to cut a zig zag pattern onto a template, each tooth 30mm wide and 50mm high.

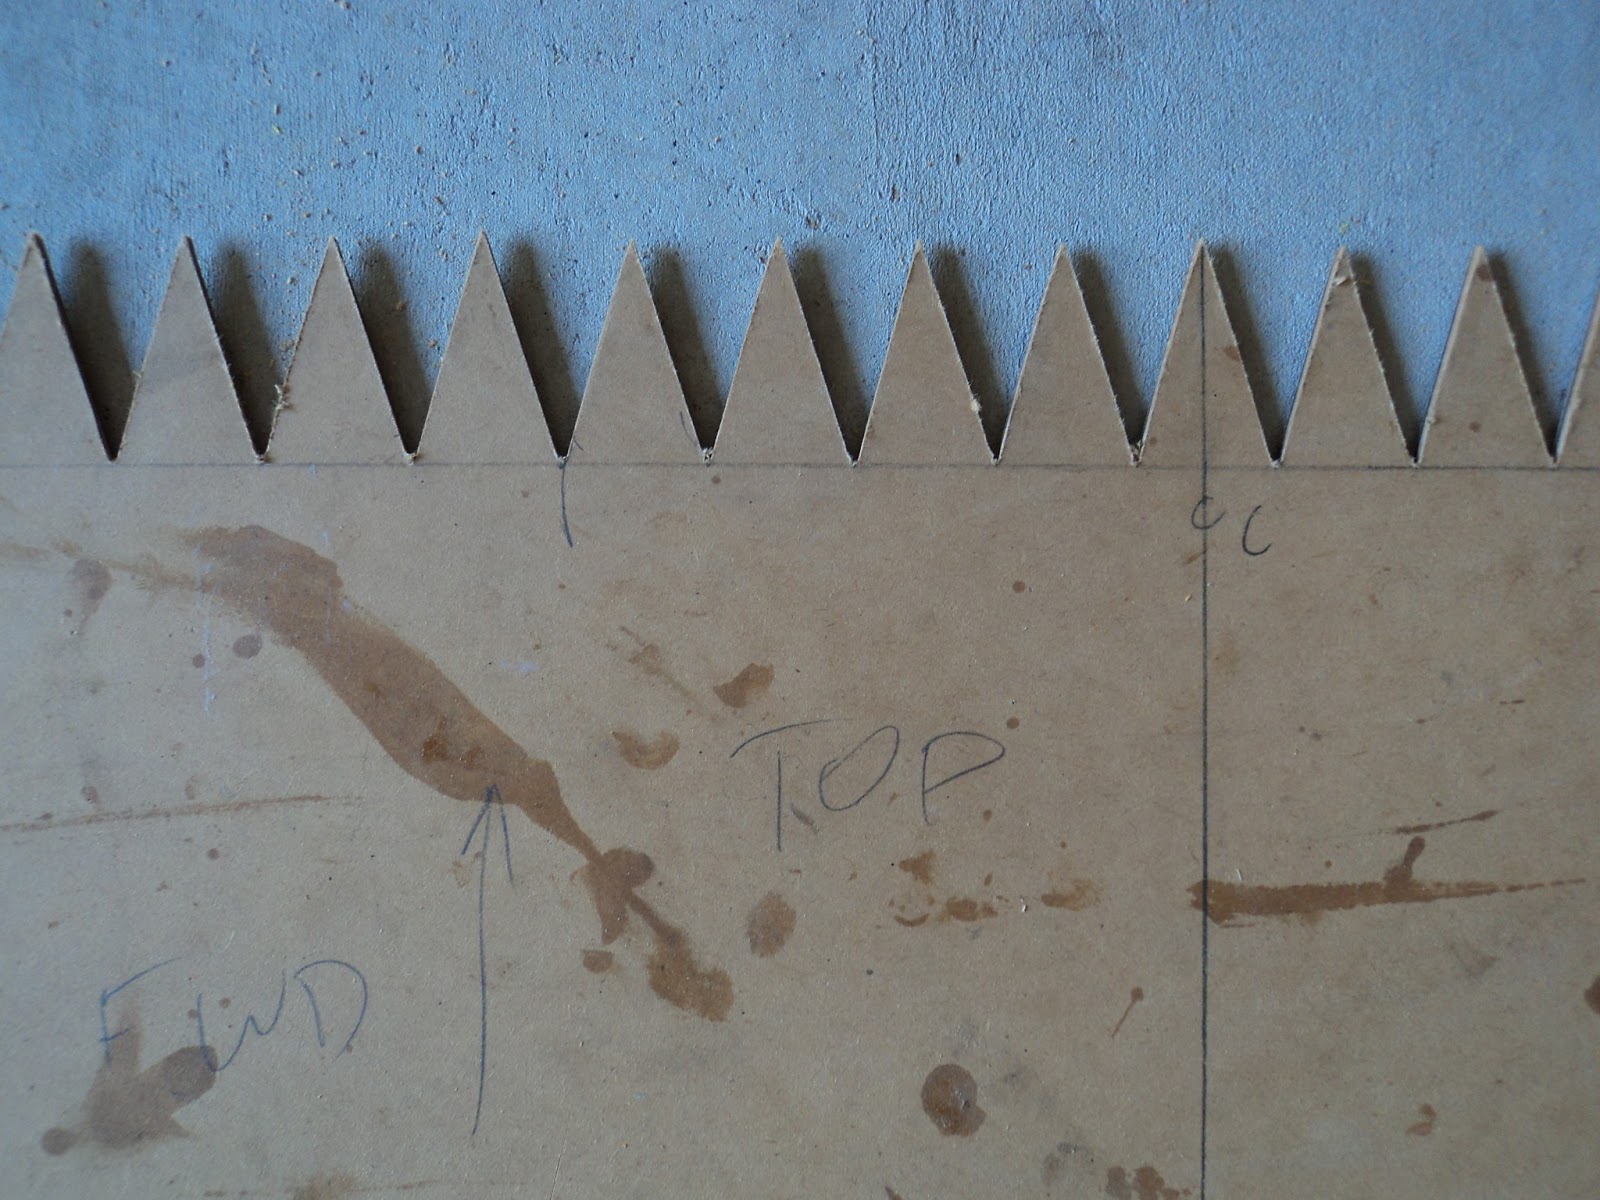
Then you transfer this onto the ply. making sure that you offset the template on the second piece so they fit together. I did one end of each of the four pieces, and marked the others to suit when assembling.

Once I had cut the zigzag, I positioned the piece and marked the edges and holes for countersunk stainless steel screws then took it off and cut/drilled. Make sure you leave space on the centreline as there will be keel bolts coming through. Each piece is screwed on about 200mm spacing along the bottom stringer as well as across way into the hardwood cross pieces of each frame.

I started with a small section between frames 3 and 5 which was necessary to ensure I could use a full sheet across the floor of the 'cabin' without a visible join. Then I marked the front one out, sides and end and cut.

Then the main full length one followed by the one that meets the transom last.

A couple of inside shots which start to show how the hull is closing in:
Inside looking forward galley (fr 5 to fr 1)

The main cabin looking toward the cockpit. The middle bits of wood are a temporary support for frames 6 as there is no hardwood cross piece in the main cabin. The two small pieces parallel to the centreline are to support the sides and form the engine box.

And finally the cockpit to transom:
More fairing required and then order some ply for the hull.
No comments:
Post a Comment